Category Archives: iPhone 7 & iPhone 7 Plus

Apple Has Stopped Signing All Public Firmwares Except iOS 11.2.5, Here Are The Details
If you are willing to downgrade iOS 11.2.5 to iOS 11.2.2 or even iOS 11.2.1 / 11.2, you no longer can as Apple has stopped signing those older firmwares.
What this basically means is that iOS 11.2.5 is currently the only latest firmware which is being signed at the moment, with all previous iOS 11.2.x versions being stopped from signing, killing any downgrade or restore possibility to or on those firmwares in the process.
This could be significant in the context of a future jailbreak for iOS 11.2.x iPhone and iPad devices given that Zimperium zLabs Team recently announced that they are going to release multiple vulnerabilities for iOS 11.2.2 and below firmwares that could potentially lead to a jailbreak.
So if you downgraded in time when we told you about this possibility, good for you. Just stay on those iOS 11.2.2 or below firmwares. Of course, if you are on iOS 11.1.2 or below, there’s already a jailbreak available for it in the form of Electra and others.
For iOS 11.2.5 and later, currently there’s no sign of any public exploit or vulnerability that could lead us to a jailbreak. If you care about jailbreaking, you better stay away from iOS 11.2.5.

As always has been the case, we will keep you updated on all things latest from the jailbreak scene. Stay tuned to us for more on this.
Change DNS Server On iPhone, iPad In iOS 11 For Fast Network Performance, Here’s How
If you have ever wondered how you can change the DNS server information on your iOS 11-powered iPhone or iPad then we have got you covered.
This step-by-step guide is going to walk you through the relatively simple process of entering new DNS information on one of Apple’s mobile devices.

It’s not very likely the average device owner will need to actually concern themselves with the DNS settings on one of Apple’s devices. Most people will simply need to connect to a wireless network and use the device seamlessly without any additional thought. However, if you need/want to change the DNS information – which is basically a server that the device points to which changes domain names into IP addresses – then rest assured that it is possible and isn’t too taxing on the brain. Let’s dive right in and take a look at the process.
Step 1: Your journey is going to start where most start on an iOS device; in the native Settings app. Tap the Settings icon like you normally would to immediately launch the Settings app.
Step 2: From within Settings, select Wi-Fi to get into the Wi-Fi settings for that device. You should already be connected to your home or work Wi-Fi network and you should be able to see a blue “i”button to the right-hand side of the cell. Tap on this.

Step 3: You will now be presented with a lot of cells containing different sets of information about the connected Wi-Fi network as well as different options for things you can change. Locate the DNS header and select the cell with the Configure DNS option.

Step 4: Select the Manual option. This will automatically animate the view to give you additional options that you can change. You will see a header titled DNS SERVERS. Tap on the green “+” icon to add a new DNS server.
If you don’t know which server to add, or don’t have any specific requirement except to speed up your network, then we recommend using Google DNS or OpenDNS, the configuration for which is given below:
Google DNS:
8.8.8.8
8.8.4.4OpenDNS:
208.67.222.123
208.67.220.123

Step 5: Enter the information of the server and then hit Save to ensure the information is persisted on the device.
Congratulations, you have now edited and added your own DNS on an iOS 11 device.

iOS 11.3 Beta Next Month Will Add CPU Throttling Toggle As Apple Confirms US Government Inquiry In The Matter
Following a report by Bloomberg yesterday, Apple has today confirmed that it has been contacted by “some government agencies” believed to be the Department of Justice and the Securities and Exchange Commission regarding its slowing down of iPhones via a software update in order to prevent unexpected shutdowns.
In response to the questions posed by the two agencies, Apple has released a statement to Axios which again reiterated that it does not slow phones in an attempt to force users to upgrade to newer devices, although that will surely not be enough to convince everyone.

Apple has not confirmed which government agencies have been in touch, but merely said that it had “received questions from some government agencies” and that it is “responding to them”.
“As we told our customers in December, we have never — and would never — do anything to intentionally shorten the life of any Apple product, or degrade the user experience to drive customer upgrades. Our goal has always been to create products that our customers love. Making iPhones last as long as possible is an important part of that.”
Apple continues to offer replacement batteries at a reduced $29, and with iOS reducing the speed of iPhones when poor batteries cannot provide the power required, a replacement should return an older iPhone to its former glory. The offer is currently available to iPhone 6 and new devices, although faulty batteries within warranty periods will obviously continue to be replaced under AppleCare.

Apple has also confirmed that it will offer a toggle to disable throttling as part of new power management options in a beta release of iOS 11.3 next month, although this is not expected to be made available to users until Spring time.

How To Downgrade iOS 11.2.5 To iOS 11.2.2 For Potential Future Jailbreak
Here’s how to downgrade iOS 11.2.5 to iOS 11.2.2 on iPhone or iPad in preparation for a potential future iOS 11.2.2 jailbreak.
If you thought you were perfectly happy running iOS 11.2.5 on your iPhone or iPad until you heard about the potential for an iOS 11.2.2 jailbreak, then you will be pleased to know that it is still possible to downgrade while Apple is still signing that firmware version. Follow the process below to do exactly that. Make sure your data is backed up though but do remember that full backups made using iTunes or iCloud on 11.2.5 won’t be compatible for restore on iOS 11.2.2.

Step 1: First and foremost, you are going to need to have the latest version of iTunes running on your Mac or PC. You can grab this via the Update mechanism in the software itself, or by heading to apple.com/itunes/download/ and downloading the latest version for your platform. You are also going to need to have the correct iOS 11.2.2 IPSW for your iPhone or iPad. You can grab the relevant IPSW file for your device from here: Download iOS 11.2.2 IPSW Links And OTA For iPhone, iPad, iPod touch. Once done, proceed to step 2 below.
Step 2: Launch the Settings app on the iPhone or iPad and head to iCloud > Find My iPhone and ensure that this functionality is toggled into Off position.
Step 3: Now, with those two things done, it’s time to connect the device to the PC or Mac using the supplied Lightning cable. You also need to put the device into DFU or Recovery Mode. If you don’t know how to do that, then you can find the process below for your device type:
- iPhone 7 or iPhone 7 Plus owners: Enter DFU Mode On iPhone 7 Or iPhone 7 Plus, Here’s How
- iPhone 8, iPhone 8 Plus, or iPhone X owners: DFU Mode On iPhone X / 8: Here’s How To Enter It
If you are still running an older device, such as iPhone 6s or iPhone 6 Plus, then you can use the old-school method of getting into DFU Mode, which involves holding down the Power and Home buttons together for ten seconds until the Apple logo appears and then releasing the power button while continuing to hold down the Home button until iTunes tells you that it has detected a device in Recovery Mode.
Step 4: You now need to be back concentrating on the Mac or PC. If you are using a Mac, hold down the Option key on the keyboard and click on the Restore iPhone… button in iTunes. If you are operating a Windows-based PC then it’s the Shift key that you need to hold down while clicking on the same Restore iPhone… button. Once prompted, select the relevant IPSW file from your computer.

iTunes will then go about its business getting that iOS 11.2.2 IPSW file installed on your connected device. Once it has finished, you will be left with a device running a clean installation of a firmware which will hopefully be jailbroken sooner rather than later using one or more of the Zimperium bugs when they become common knowledge.

Enter DFU Mode On iPhone 7 Or iPhone 7 Plus, Here’s How
Here’s how you can enter DFU mode on an iPhone 7 or iPhone 7 Plus. As you may already know by now, Apple’s iPhone 7 and iPhone 7 Plus features a new capacitive Home/Touch ID button that uses the company’s proprietary Taptic Engine to provide feedback when an action has been complete instead of being mechanical like on previous iPhones.
This new Home button integration means that the process of putting both devices into DFU mode has changed slightly to accommodate the removal of the mechanical button. We’re going to run you through the new DFU mode process to allow you to familiarize yourself for when the need arises.

Step 1: First and foremost, you’re going to need to ensure that you have the latest version of Apple’s iTunes installed on your Mac or Windows-powered PC. This is something that a lot of people forget about and think that iTunes isn’t really that important. As of this writing, the latest version of iTunes is version 12.5.1. Make sure you have it installed on your computer before proceeding with other steps.
Step 2: Now with latest version of iTunes installed on the computer, take your iPhone 7 or iPhone 7 Plus and plug it into your Mac or PC via the supplied Lightning cable.
Step 3: Now power down your iPhone 7 as you normally would by pressing and holding the power/lock button until the slide to power off prompt appears. Slide it to turn it off.
Step 4: Once the phone is turned off, press and hold the power/lock button on the right side of the iPhone 7 or 7 Plus for a period of 3 seconds. With the power/lock button still pressed, press and hold the volume down button on the other side of the iPhone. Keep holding both buttons down together for approximately 10 seconds.
Step 5: After approximately 10 seconds, release the power/lock button, but make sure that you continue to keep the volume down button held down for another 5 seconds.
If you either see the Apple logo appear on the screen, or if you see the iTunes logo with Lightning cable appear on screen, then you have held the volume down button down for too long. In either instance you will have to re-start the process again.
Step 6: If you nail the timings, the display will remain all black, confirming that the device has entered into DFU mode successfully. iTunes will also confirm this with a message.
Now that the hardware has successfully been put into DFU mode, you should be able to run through the usual process of actually restoring it if required. If at first you don’t succeed, make sure to keep trying again as it will take a little while to get used to the new method.

Download iOS 11.2.2 For Your iPhone, iPad, iPod touch
Apple has officially started 2018 in the giving mood with the immediate release of iOS 11.2.2 for all compatible iPhone, iPad, and iPod touch devices.
The release means that compatible device owners can grab iOS 11.2.2 right now as an over-the-air (OTA) update or as an IPSW download.
As the naming convention of this latest release suggests, iOS 11.2.2 is very much a minor point release which contains nothing more than bug fixes, security patches, internal improvements, and small refinements designed to make iOS more streamlined and nicer to use for all compatible device owners. Unlike previous releases of iOS 11, such as iOS 11.2, this is not designed to unlock or include large chunks of new functionality or feature improvements, instead, it’s being put in place by Apple to try and build on what’s already in place and refine the whole iOS 11 experience.
After all, we need to remember that Apple has previously been forced to rush out new versions of iOS 11 ahead of schedule in order to fix some critical bugs. iOS 11.2.2 is an opportunity to stabilize and get things back on track.
iOS 11.2.2 may not be feature-packed, Apple says “iOS 11.2.2 provides a security update and is recommended for all users”, but it’s every bit as important as any version of iOS which has come before it. Any issues reported should have been eradicated by now and it should include the necessary changes to ensure that all device owners get a positive experience.

If you do have a compatible iPhone, iPad, or iPod touch, and want to get your hands on iOS 11.2.2, then you can grab the OTA update right now from the Software Update mechanism in Settings. Alternatively, if you prefer a fresh install, you can grab the relevant IPSW file for your device from the links below and then update or restore using iTunes.
iOS 11.2.2 Download IPSW Direct Links:
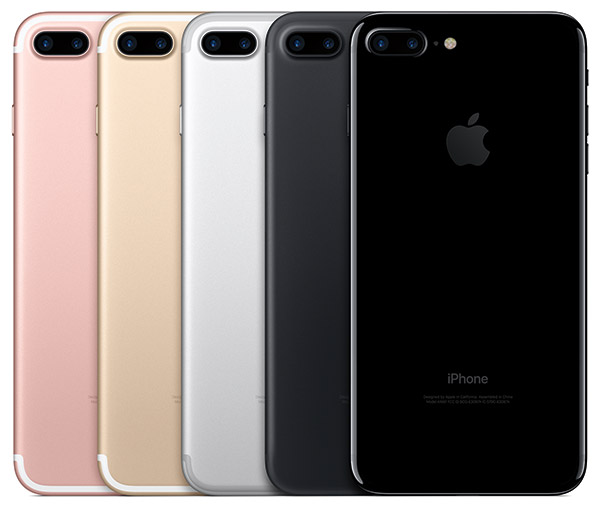
- iPhone 7 (iPhone9,1)
- iPhone 7 Plus (iPhone9,2)
- iPhone 6s, iPhone 6
- iPhone 6s Plus, iPhone 6 Plus
- iPhone SE, iPhone 5s GSM, iPhone 5s CDMA
- iPad Pro (10.5-inch)
- iPad Pro (12.9-inch) (1st generation | 2nd generation)
- iPad (9.7-inch)
- iPad Air 2, iPad mini 4, iPad mini 3
- iPad Pro (9.7‑inch)
- iPad Air 1, iPad mini 2
- iPod touch (6th generation)
- iPhone10,4 (iPhone 8)
- iPhone10,5 (iPhone 8 Plus)
- iPhone X

iOS 11 ARKit Compatibility For Apps: Check If Your Device Is Compatible With Apple’s AR Platform
iOS 11 ARKit compatibility for apps, is your iPhone or iPad device compatible with Apple’s new AR platform? Check the list here to find out.
One of the things that is most definitely part of Apple’s iOS 11 is the company’s first foray into the world of augmented reality, with the outfit bringing its ARKit platform that allows developers and device owners to take advantage of all that augmented reality can have to offer.

Demonstrated first during WWDC keynote to a great reception, Apple’s augmented reality implementation has the potential to be game-changing considering the mobile nature of its iOS devices and how that could be used when iOS developers get to work. However, Apple’s own website has given both developers and users some pause after confirming that not all iPhones and iPads will be able to take advantage of ARKit-enabled apps due to hardware limitations on older-generation devices.
According to Apple, in order to use ARKit, iOS devices need to have an A9, A10 or A11 chip beating at their heart. While certainly not all iPhones or iPads in out there will meet that criteria, there should be plenty of people for which ARKit development will prove worthwhile.
The devices that use A9, A10 and A11 chips are:
- iPhone 6s and 6s Plus
- iPhone 7 and 7 Plus
- iPhone SE
- iPad Pro (9.7, 10.5 or 12.9) – both first-gen and 2nd-gen
- iPad (2017)
- iPhone 8 and 8 Plus
- iPhone X
So yes, pretty much all iPhone models from iPhone 6s and above are supported and so is the iPhone SE. All iPad Pros and the current standard 2017 iPad model is also supported, which means that the most recent round of iPads barring the iPad mini are also fine with ARKit and ARKit compatible apps.
