Blog Archives

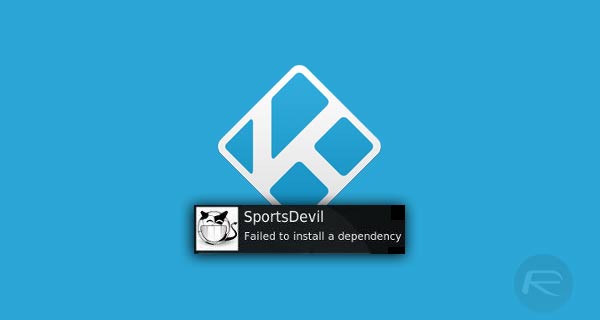
How To Fix Failed To Install A Dependency Error In Kodi 17 / 17.6 Krypton
Here’s how to fix Kodi Failed to install dependency error in Kodi version 17 or 17.6 Krypton 2018 edition running on a compatible platform.
If you have a Kodi installation and have been experiencing errors around failing to install a dependency when installing addons, then you are probably at the end of your tether trying to not only work out the cause of the problem but also fix it. If you are infuriated with this problem and are running Kodi 17 / 17.6, then carry on reading for what will hopefully be an immediate fix to your problem.
Step 1: With the Kodi installation open, click or tap on the gear icon to head into Settings. You will then need to head across and select the File manager option.
Step 2: When inside of the File manager, double-click on Add source and then select the entry field which will contain the wording <none>. This will let you enter the details of the source in. Enter the following: http://fusion.tvaddons.ag and select OK.
Step 3: Use the Enter a name for this media source option to give it a name of your choosing. Select OK again. You can now navigate back to the main Kodi home screen.
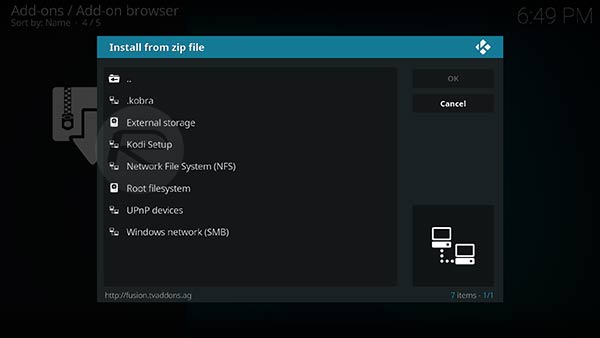
Step 4: On the main home screen, select the Add-ons option from the main menu system. In the top left-hand corner select the box icon which represents the Add-on Browser.
Step 5: Select the Install from zip file option and then select the media source based on whatever you called it in Step 3 above.
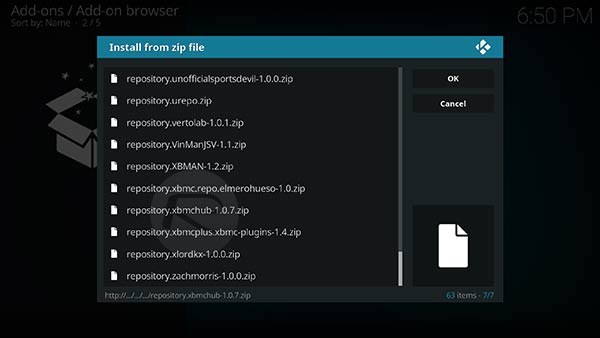
Step 6: Select kodi-repos and then english. Scroll down until you find the repository called repository.xbmchub-1.0.7.zip. Select it.
You then need to wait until Kodi gives you a notification saying that the Add-on has been installed.

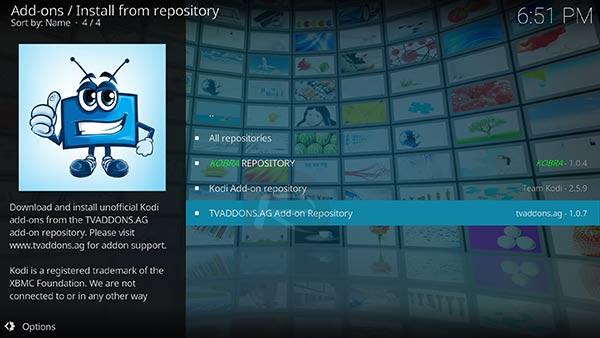
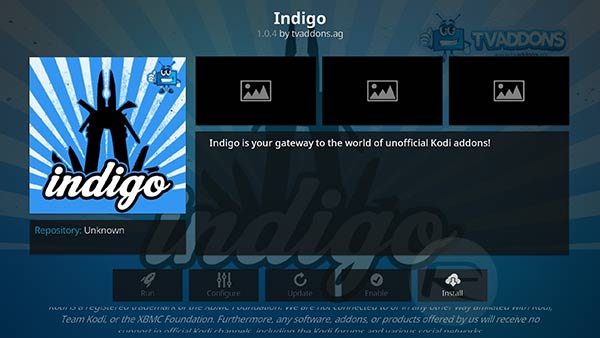
Step 7: Now, select the Install from repository option and choose the TVADDONS.AG Add-on Repository option. Select Program Add-ons, and then select Indigo.
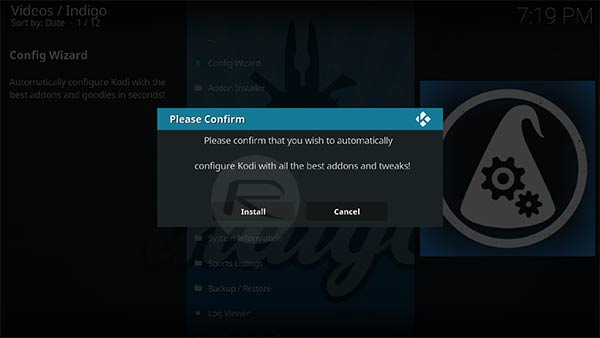
Step 8: When the Indigo page is brought up, select the Install option at the bottom of the interface. When it is installing, select the Config Wizard option and repeat the same installation process.
Step 9: Move back to the root of the Add-ons section and select Indigo and then select Config Wizard and select Install.
Step 11: Once that is actually installed by Kodi, you will then need to restart Kodi and you should be good to go without experiencing any of the problems that previously were in place.
Update: With http://fusion.tvaddons.ag repo now dead, you can try http://fusion.tvaddons.corepo in its, or more specifically our updated Indigo guide here.

How To Install Kodi Indigo Addon In 2017
Is Kodi Indigo (Fusion) addon not working for you? Here’s how to install it in 2017 on Krypton 17 the right way.
Any experienced Kodi user will already be aware that there are tons of wonderful add-ons available for Kodi, all of which have their own little slant and offer their own take on things. The Indigo add-on is slightly different to most in that it allows a user to perform certain administrative tasks, such as adding and removing add-ons, tweaking certain elements of Kodi to try and get the best performance, and evening being able to instantly view event logs for troubleshooting purposes.

It’s evident from its functionality that the Indigo offer won’t really appeal to every single Kodi user, but it will definitely to those who like to maintain control over their installation. Check out the steps below to get up and running with it right away.
Enable Unknown Sources
Step 1: Load up the Kodi installation on whatever hardware you are running. Select System Settings and choose Add-ons.
Step 2: Within the Add-ons section you will see an option called Unknown sources with a toggle option next to it. Make sure that it toggled into the On position.
Install Indigo (Fusion) Kodi Add-on
Step 1: We are going to need to get the right source in place before we can access all of the content. Select System settings and then File manager. When inside of File manager you will need to choose the Add source option.
Step 2: Tap into the part of the interface that allows you to add the source URL. This will be denoted by a placeholder shown as <None>. Enter the following URL and select OK: http://fusion.tvaddons.co
Call the repository .fusion2 (or any other name of your choice) and select OK.

Step 3: Head back to the Kodi main menu and select Add-ons. Select the open box icon at the top of the interface and select Install from zip file.
Step 4: Select .fusion2, followed by selecting begin-here > plugin.program.indigo-#.#.#.zip.
That’s it! Once the add-on is installed, head back to the main menu Add-ons section and load up the Indigo add-on.

A first time opening will ask you to install some additional files, so just click yes on that to progress. You should be free to use it now.
